Have you ever walked into your kitchen only to find water dripping from your radiator? It can happen to almost any homeowner and can creep up on you when you least expect it.
A leaky radiator can be a serious problem in your home. Not only can it cause water damage and the need for costly repairs, but it also indicates other potential problems with your plumbing system. Luckily, fixing a leaky radiator isn’t too difficult – but there are some important steps you should take to ensure the job is done correctly.
How easy is it?
Fixing a leaky radiator is easier than you might think. In fact, if you have the right tools and supplies on hand, the process should only take about an hour or so. However, if you don’t know what you’re doing, it’s always best to get help from a professional plumber who can make sure that everything is done correctly.
How long does it take?
If you’re experienced with DIY projects, fixing a small radiator could take less than an hour; however, if this is your first time fixing a leaking radiator, it could take up to two hours or more. Again, getting help from a professional plumber will speed up this process significantly.
First Things First – Identify Where The Leak Is Coming From
Before attempting any type of repair on your radiator, it’s important to identify the source of the leak first. Try looking around the valves at both ends of your radiator for any visible signs of water leakage or dampness. If there are none, then check underneath your radiator for any traces of wetness or moisture, which could indicate a problem with one of its pipes or connections.
Leaky Radiator Body:
It’s common for pinhole leaks to appear on the panel of a radiator. Identify where the leak is coming from and clean around the holes in the radiator body. Then, start applying epoxy paint to fill the pinholes – without needing to replace the entire radiator body! Once the epoxy is completely dry, you can refill the radiator body and get back to your warm home.
Leaky Thermostatic Valve:
For a leaky thermostatic valve, turn off the hot and cold water supply valves near your boiler and remove the old thermostatic valve from its housing using adjustable pliers. Clean the area thoroughly and install the new valve, making sure not to overtighten. Finally, turn on the hot and cold water supply valves again before testing the new valve for a few minutes, ensuring no leaks are present anywhere else.
Steps To Fix A Leaky Radiator Valve:
One of the most common problems is a leaking radiator valve. If you’re looking for an easy fix for this problem, you’ve come to the right place. In this section, we’ll show you how to fix a leaking radiator valve in four simple steps.
Step 1: Stop the Water Flow
To do this, turn off the water supply and then open up all of the radiators in your home until they have completely emptied out. This will ensure that no more water flows through the pipes while you are trying to repair them.
Step 2: Drain the Radiator
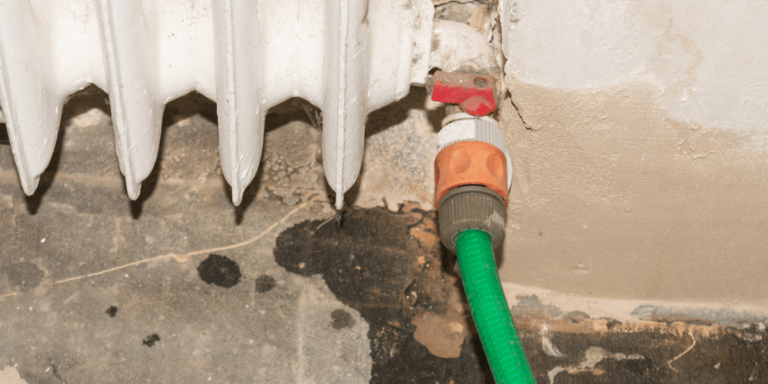
Once all of your radiators have been emptied, it’s time to drain the radiator itself. To do this, locate the drain plug at the bottom of your radiator and unscrew it using an adjustable spanner or wrench. After the water has drained out of your radiator, it’s ready for repair.
Step 3: Add PTFE Tape
The next step is to add PTFE tape (also known as the plumber’s tape) around both sides of your radiator valve stem before screwing it back into place. This will help create a tighter seal, so there is less chance of future leaks. Be sure to wrap each side with at least three layers of PTFE tape – any more than that won’t necessarily make a difference, but too few and you risk not having enough protection against leaks.
Step 4: Refill The Radiator
Simply turn on the main water supply again and let it fill up until it reaches just below its maximum fill line (usually marked with a red line). Once full, close up all radiators except for those near where you were working on repairs – these should remain open until their air locks have been released (which usually takes about five minutes).
Leaky Radiator Spindle:
A leaking radiator spindle is usually caused by a loose connection between the spindle and the radiator itself. To fix this kind of leak, you’ll need to turn off the water supply and drain away any remaining water in the system. Once that is done, you can use an adjustable spanner or pliers to tighten up any loose connections on the spindle. If this doesn’t do it, try using some PFTE tape in the spindle and tighten it back up.
Leaky Radiator Gland:
The next type of leak can come from a radiator gland—a small valve at the bottom of your radiator that allows excess air or steam to escape while preventing water from leaking. If your radiator gland is leaking, turn on the valve and see if any water leaks from the plastic cup. If water does come out, turn off the lockshield and remove the plastic cup. Unscrew the gland nut and wrap PTFE tape around the valve spindle. Then, with a flat-headed screwdriver, force the tape into the body of the valve and screw the gland nut back on.
Leaky Radiator Pipe Joint:
The final type of leak can come from one of your pipe joints, where it connects with your radiator. Use a spanner to tighten up the joints, and if it continues to leak – drain the radiator, remove the nut of the leaking pipe and wrap some PTFE tape around where the olive meets the joint. Retighten the nut, and you should be good to go.
Try a leak sealer
If all else fails or if you’re looking for an easier solution than trying to locate and repair tiny leaks around your pipes, why not try using a sealant? There are various brands available that claim they are able to stop small cracks or leaks in radiators and other plumbing fixtures without having to replace anything. However, it’s always best practice to check with an expert plumber first before attempting anything yourself.
FAQ’s
Why is my radiator leaking?
Radiator valves are responsible for controlling the flow of hot water from the boiler through pipes and into the radiator. Over time these valves can become corroded or blocked with mineral deposits, leading to a leaky radiator valve. Faulty or worn-out valves often cause leaky radiators. A damaged seal or gasket around the valve may be causing the leak.
Do I need to replace a radiator valve?
In most cases, yes – replacing a radiator valve is usually necessary to properly fix a leaky radiator. Fortunately, it’s a relatively straightforward process that almost any DIYer can do without much difficulty. Just scroll up to our quick four-step guide on fixing a radiator valve, or head to our blog for a more detailed approach!
How do I prevent future radiator leaks?
Radiator leaks can often be prevented with proper maintenance and care of your radiators and their components. To start off with, make sure that all valves connected to your system are tightly closed at all times – even if they appear closed already. Also, inspect all surfaces for wear or corrosion regularly; if anything looks suspicious, it should be replaced immediately, as even small cracks in seals or gaskets can lead to large problems down the line.
Finally, flush out your radiators every few months using an appropriate cleaning solution such as white vinegar or baking soda diluted in warm water; this will help keep mineral deposits at bay and reduce unwanted buildup inside them too.
In conclusion…
Fixing a leaking radiator doesn’t have to be hard. With just an hour and some help from an experienced plumber, you can repair most minor leaks without having to call in expensive professionals whenever something goes wrong with your heating system at home. Patience and precision – why wait?

